Preparing SolidWorks CAD models for OpenFOAM's snappyHexMesh
This post is a quick tutorial for preparing geometry in SolidWorks for meshing with OpenFOAM’s snappyHexMesh. Note that these tips are mainly for external flows, but should generally carry over to internal geometries.
1. Clean it up
This step is common for all types of simulations. Unnecessary details should be removed from the CAD model such that the behavior can be simulated with minimal geometric complexity—use your judgement. For example, if simulating aerodynamics around a car body, bolt heads may be unnecessary. If working with an assembly, I prefer to save as single part first. Small features can then be removed, and the part can be simplified such that it is a single watertight object.
2. Get the coordinate system right
Make sure the SolidWorks model is located where you want it to be in the simulation, i.e., it is oriented properly with respect to the coordinate system of the OpenFOAM mesh. SolidWorks defines the positive z-direction normal to the front plane, whereas I prefer it normal to the top. Instead of using move/copy features, you can alternatively create a new coordinate system to select when exporting from SolidWorks.
3. Export to STL
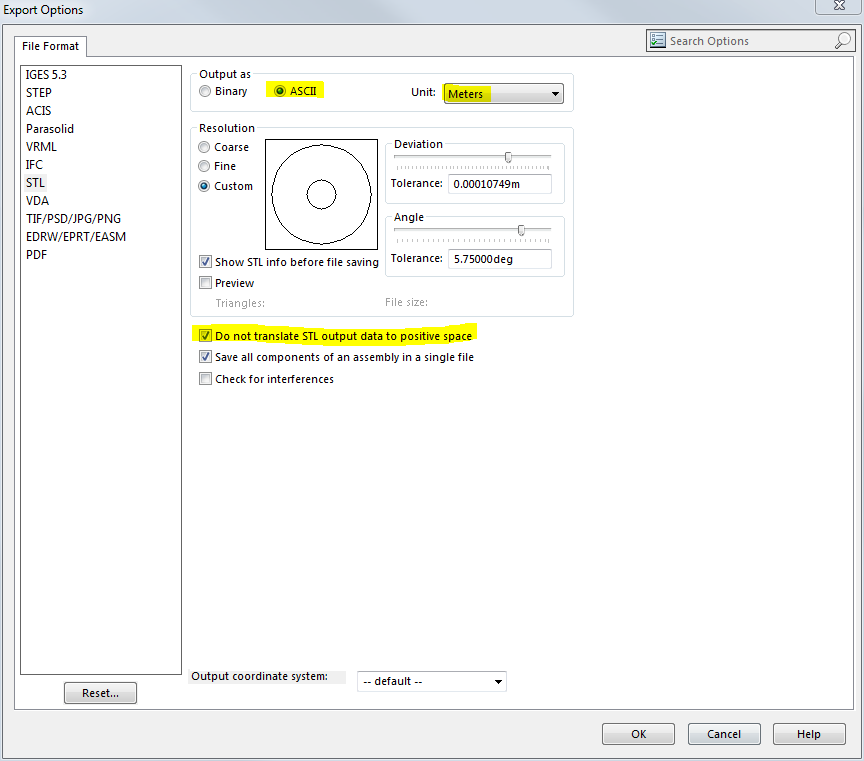
Once the model is ready, select “File->Save As…” and pick “*.STL” under “Save as type:”. Next, click the options button. Make sure the option to not move the model into positive space is checked, that the units are correct (OpenFOAM works in meters), and that you are saving as an ASCII, not binary, STL. Note the capital letters SolidWorks uses in the file extension by default, and that Unix file systems are case-sensitive.
You should now have an STL compatible with snappyHexMesh, and are ready to embark on the sometimes treacherous path towards its optimal meshing settings.