-
September 22, 2015
Software Carpentry at UNH
This summer we held a Software Carpentry (SWC) scientific computing workshop at the UNH School of Marine Science and Ocean Engineering (SMSOE). The goal of the workshop—and of Software Carpentry in general—was to improve the efficiency of researchers by exposing them to computing tools and workflows they may not have seen in their undergrad training. The workshop took place over two days (August 27–28) at the Chase Ocean Engineering Laboratory, where grad students, research staff, end even professors brought in their laptops and actively learned Bash shell commands, Python programming, and Git version control. See the backstory to read why and how things came together.
SWC found us two great volunteer instructors: Byron Smith, a PhD candidate in ecology and evolutionary biology at the University of Michigan, and Ivan Gonzalez, a physicist and programmer at the Martinos Center for Biomedical Imaging in Boston, and a veteran Software Carpentry instructor. We also had another workshop helper, Daniel Hocking, a UNH PhD alum in Natural Resources and Environmental Studies currently working at the USGS Conte Anadromous Fish Research Center.
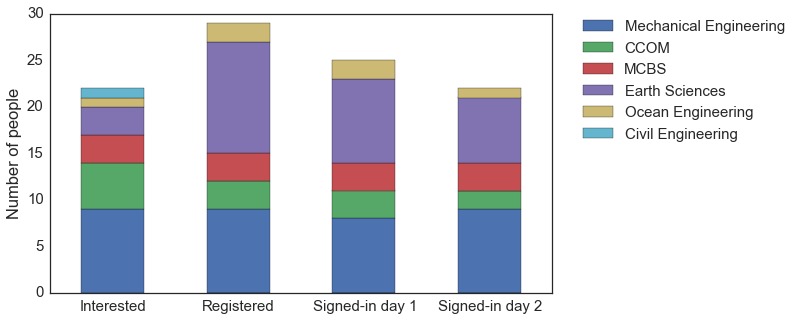
27 out of 29 registered showed up bright and early at 8 AM the first day, filling the classroom just about to capacity. Despite some minor issues—mainly due to the Nano text editor and the new release of Git for Windows—everyone’s laptop was ready to go in a half hour or so.
In the first lesson, Ivan taught automating tasks with the Bash shell. Learners typed along, using the command line for automating tasks like copying and renaming files, searching, and even writing scripts to backup data; things that take a long time to do manually.
Byron took over for the first day’s afternoon session, diving into Python by introducing the amazingly useful IPython Notebook. The lesson started from the absolute basics, to accommodate the learners’ large range of experience, though even the MATLAB experts were engaged by the foreign (in my opinion, nicer!) syntax. The crowd went wild then they realized it was possible to create a document with runnable code, which also includes equations rendered with LaTeX.
The second day had a lower turnout—23 versus the first day’s 27—which can be partially attributed to scheduling conflicts. It was a challenge to find a full two day block that worked for everyone, especially when they’re from a few different organizations. It was also freshman move-in day, so these people were extra brave to be on campus!
Ivan kicked off day 2 by introducing learners to Git, the most popular tool for tracking versions and collaborating on text files—especially code. Git can be somewhat hard to grasp conceptually, so Ivan explained the various processes with some diagrams on the chalkboard. I knew this was an effective technique when my advisor (a workshop attendee) later told me he was putting changes to a paper we’re writing in the “staging area.”
After lunch, Byron picked up where we left off with Python, teaching how to modularize programs with functions, and how to write tests to ensure code does what we think it will—before it has to. Ivan took the last hour to present a capstone project to sort of wrap all the tools into a single workflow. Despite being a little crunched for time, most learners were able to fork a repository on GitHub (probably the most common mode of software collaboration these days), clone this to their local machine, then write some Python to download and visualize data from NOAA’s National Buoy Data System, some of which is collected by researchers affiliated with the SMSOE!
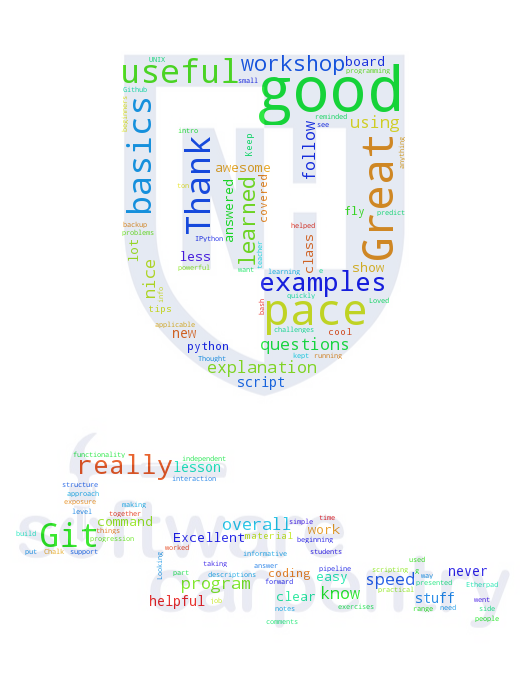
To visualize how things went, and show some more Python programming examples, I put together a “word cloud,” shown in the upper right, from the learners’ positive feedback, and some stacked bar charts (below) from the participation data—consisting of responses to the initial interest assessment emails, registrations, and daily sign-in sheets. The code and data to reproduce these figures are now available in the site repository.
As expected, a significant number of participants came from Mechanical Engineering (ME), with the remainder coming from other departments tied to the SMSOE. Learners from Earth Sciences didn’t seem as interested in the workshop at first (or they don’t like to reply to emails); though quite a few registered, and a few dropped off each step from there onward. The Molecular, Cellular, and Biomedical Science (MCBS) department was consistently represented all the way through, while it seems someone from ME may have forgotten to sign in on the first day.

Workshop participation by department. Grad students made up the majority of participants, as expected, but we ended up losing a couple along the way. We had two research staff and three professors participate, with the number of professors remaining steady at each stage along the way. Way to commit, profs!

Workshop participation by job title. Overall, the workshop went very well. Byron commented on how an event like this is about the best teaching environment you can ask for, since everyone wants to be there. Most importantly, quite a few learners let us know that they picked up some new skills that will help them do their research more efficiently and effectively.
Acknowledgements
None of this would have been possible without the support of a handful of people; first and foremost, Ivan, Byron, and Daniel who donated so much of their time. Thanks to Greg Wilson for caring enough about the cause to start the Software Carpentry Foundation. Professor Brad Kinsey, chair of the ME department, and the SMSOE Executive Committee provided funding, for which they deserve a huge thanks. Finally, thanks to Sally Nelson and Jim Szmyt, who helped with organization and logistics. The first ever Software Carpentry workshop at UNH was success and a lot of fun. Hopefully someone will organize another one soon!
-
September 21, 2015
Software Carpentry at UNH: The backstory
I first heard of Software Carpentry in a YouTube video of its founder Greg Wilson’s talk at the SciPy 2014 conference:
The talk really impressed me. I was convinced that their work was absolutely crucial for an open and more productive research community to exist. This was a mostly selfish thought, by the way. I was tired of reading papers with seemingly awesome results, but not having access to the source code to reproduce (and maybe build upon) those results. I was also fed up with emailed Word documents and the resulting lost changes and half-baked version-control-via-file-name. I was never taught any better though, which is exactly why we need groups like Software Carpentry!
Shortly after watching the talk, I submitted a form on the Software Carpentry website requesting more information regarding hosting a workshop at UNH, where I am currently wrapping up a PhD in mechanical engineering. I ended up getting some information, but decided I had enough on my plate with research and put the idea back on the shelf.
Fast-forward six months or so. I received an email from the man himself, Greg Wilson, asking what I thought about hosting a workshop at UNH. Almost star-struck, I was reinvigorated and decided to try to get the ball rolling. Besides, graduating is overrated anyway.
I had some emails sent around my department and the School of Marine Science and Engineering (SMSOE) to gauge interest. To my surprise, more than 20 people responded, which was enough to move forward. The next task was to find funding for the administrative fee and travel and accommodations for the volunteer instructors. A couple proposals later, the SMSOE and ME department agreed to fund the workshop at an approximate 80/20 ratio.
The workshop was to take place during the summer, which made finding instructors within close proximity (to save on travel costs) a little tricky. A few rounds of prospective candidates later, Byron Smith, a PhD candidate in Ecology and Evolutionary Biology at the University of Michigan, and Ivan Gonzalez, a physicist and programmer at the Martinos Center for Biomedical Imaging in Boston agreed to teach our workshop. Software Carpentry also found us another helper, Daniel Hocking, who is a UNH PhD alum in Natural Resources and Environmental Studies currently working at the USGS Conte Anadromous Fish Research Center. Being volunteers for such a great organization, there was no question that these guys were going to do an awesome job.
I was excited. We had the funding, the room, the instructors, and the dates set. The only thing left was to get some learners registered and make it happen!
